
How to Use Organizational Workspace for Efficient Teamwork
To share, review, and manage workflows created in a personal work environment at the team level, we guide you through the entire process from creating an organization, inviting members, sharing workspaces, board-based feedback, to checking the organization gallery in the actual work order.
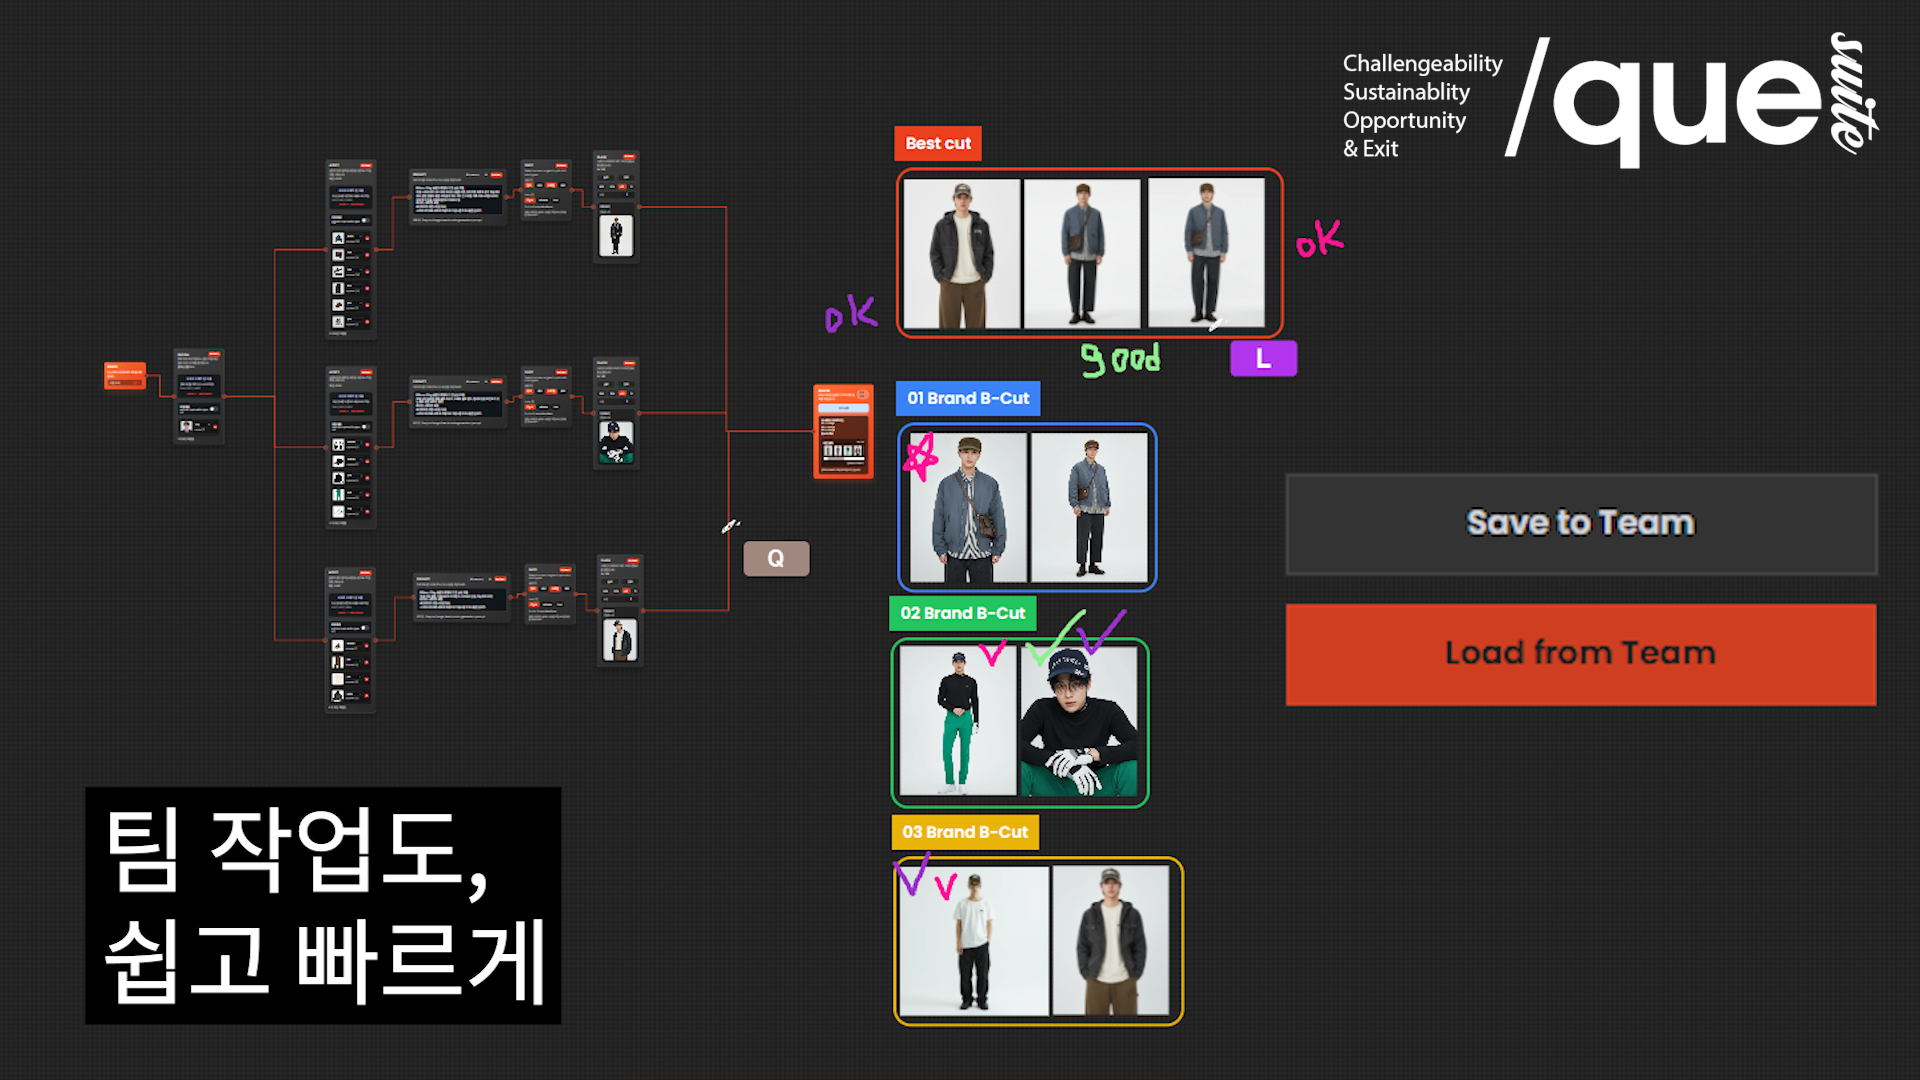
This document is a collaboration guide for those new to the QUELSUITE organizational workspace feature.
We provide a step-by-step guide to the organizational collaboration flow where personal work is shared at the team level, results are checked together in the same workspace, and real-time feedback is continued on the board.
Entering the Organization Feature
Enter the studio and click the building icon on the top toolbar.

Click the create organization button.

Select a plan suitable for the organization and proceed with payment.
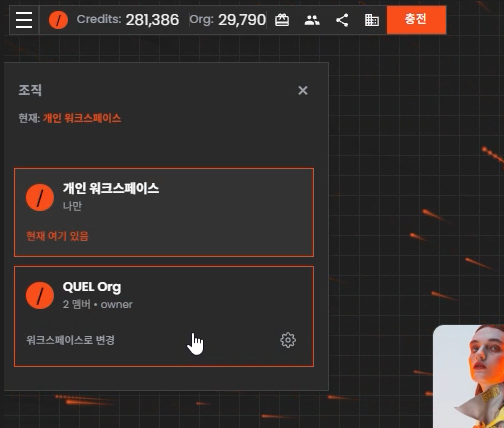
After completing the payment and settings, you can see that the organizational workspace is formed below the personal workspace.
Inviting Organization Members & Preparing for Collaboration

Since the organizational workspace is based on collaboration, it is necessary to invite team members.
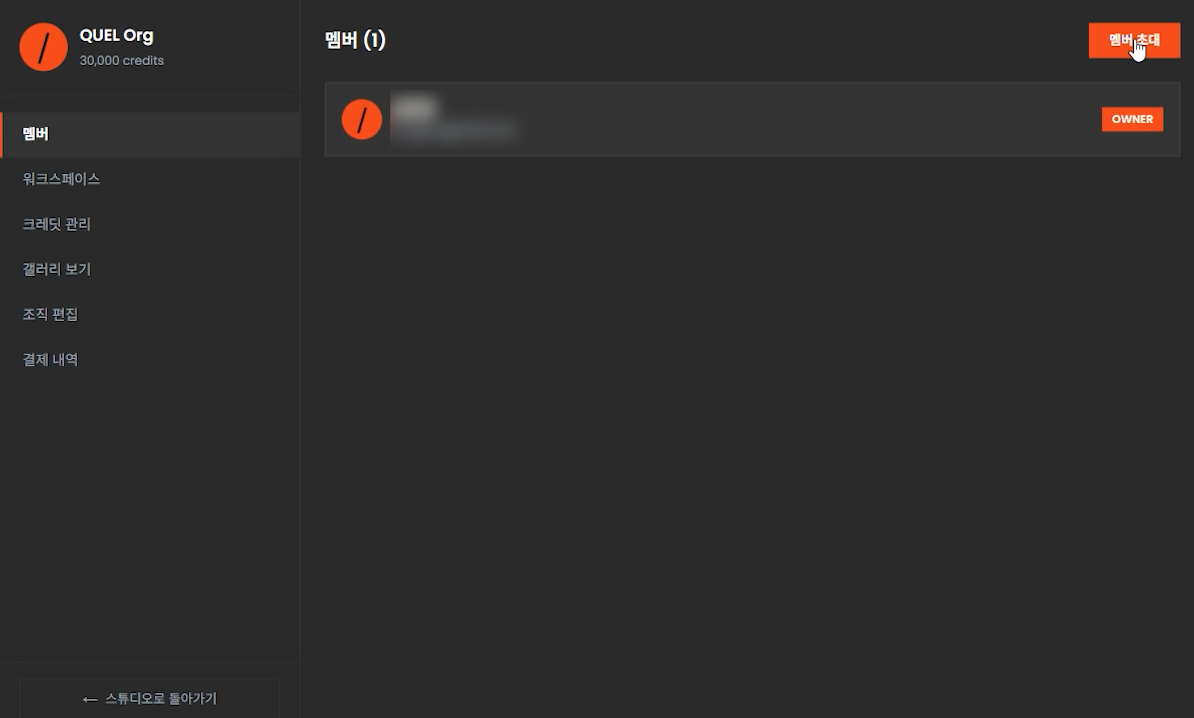
Click the invite members button in the members tab of the organization settings to send an invitation link to the member's email.
Once the member accepts the invitation, the member is automatically added, and the organizational workspace can be used.

Select a studio suitable for the organization's needs to create a workspace. You can also create a custom studio if necessary.
The creation of the organizational workspace is complete. All preparations for collaboration are finished.
Sharing Personal Workflow with the Team
When a good workflow or result is created in a personal workspace, it would be great to share it with team members to enhance the overall productivity and insights of the team.
In QUELSUITE, personal workflows can be easily shared with the organizational workspace.
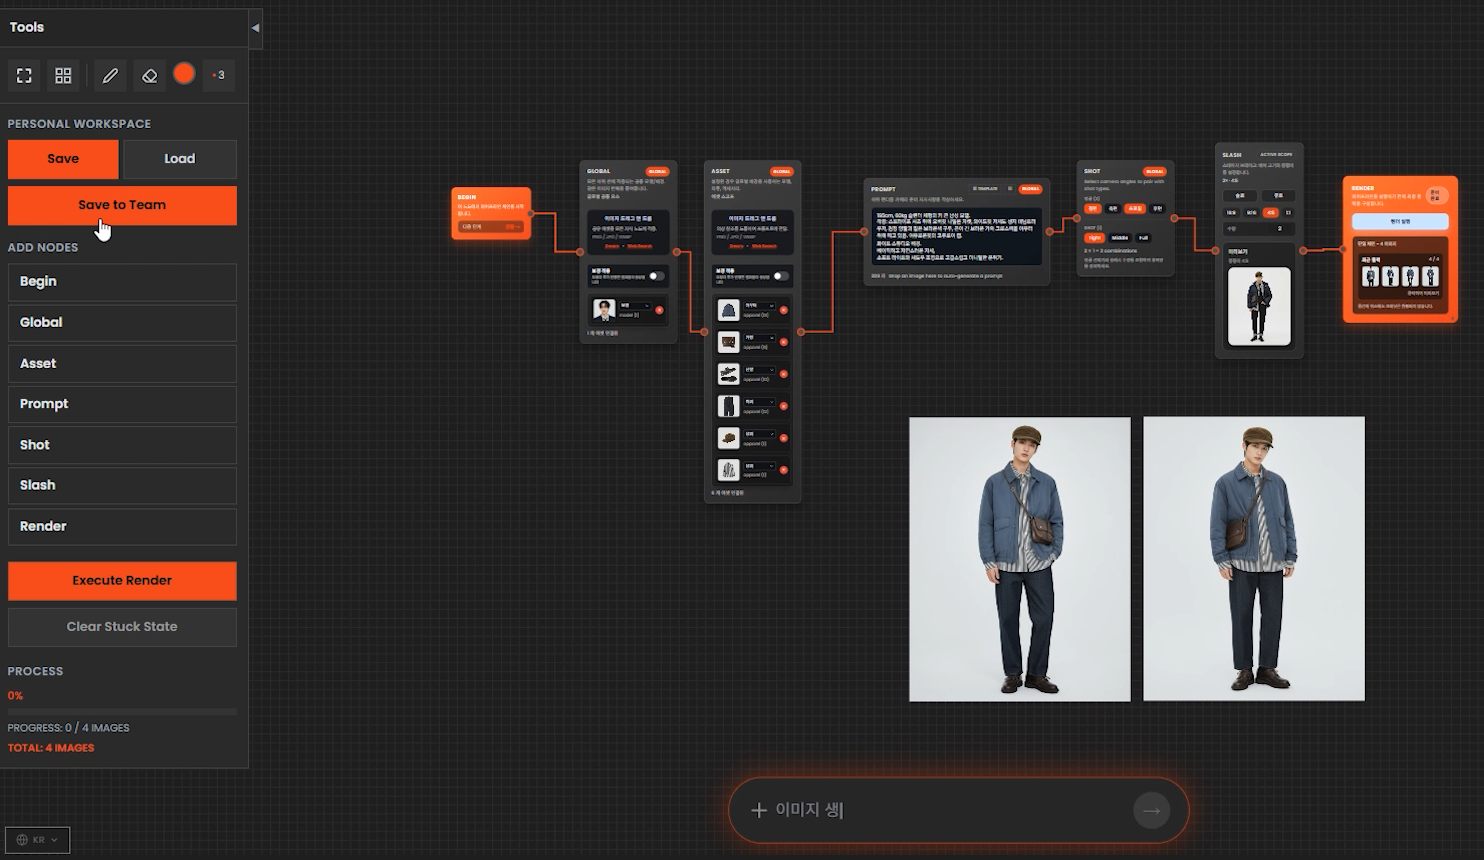
Click the Save to Team button on the left toolbar of the personal workspace.
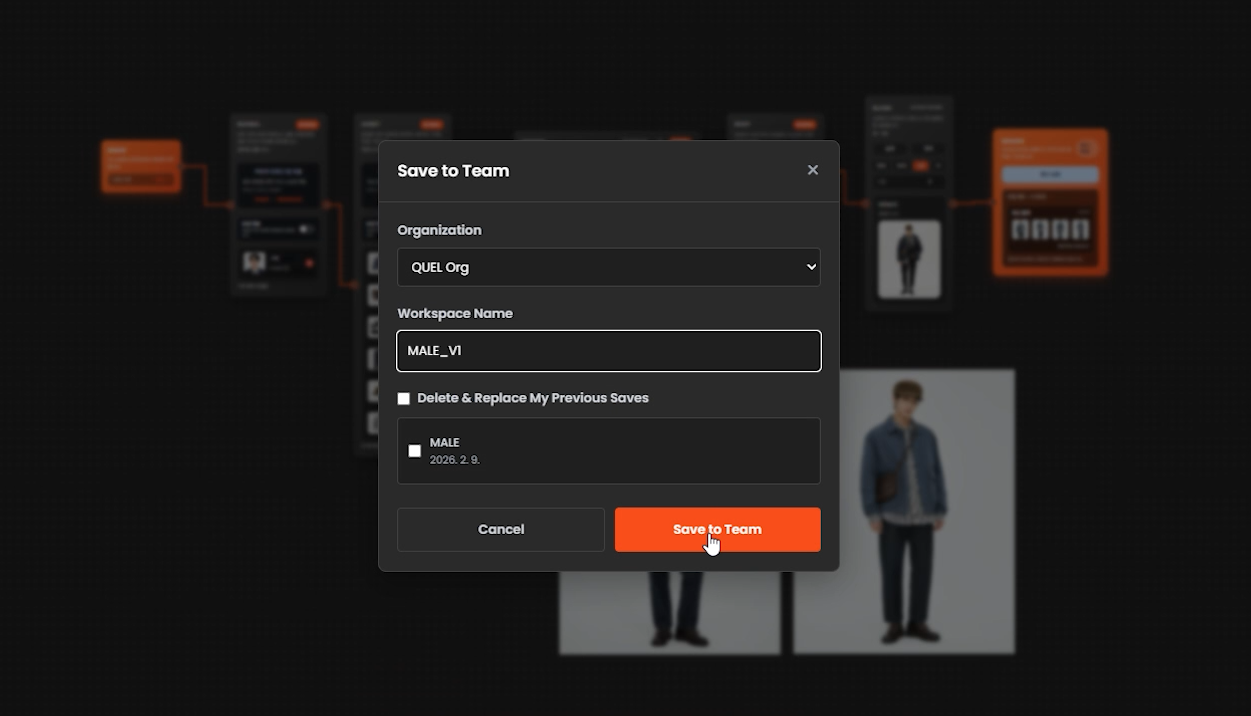
Enter an appropriate name and click the Save to Team button.
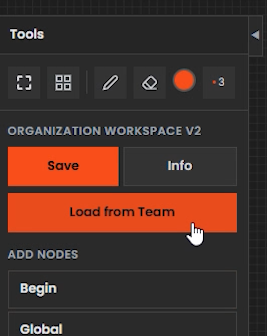
Access the organizational workspace and click the Load from Team button on the left toolbar.
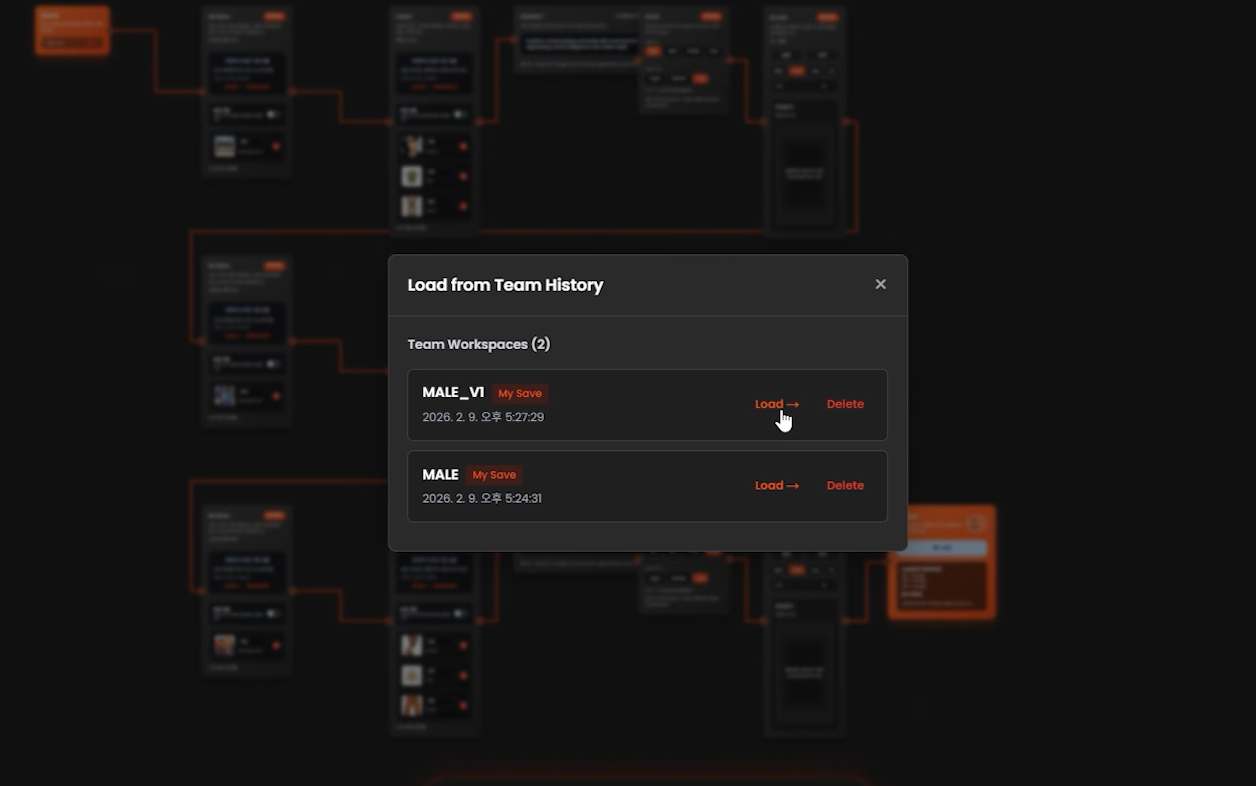
Select the desired workspace from the save history to load it.
* It is recommended to perform this task after saving the existing organizational workspace.
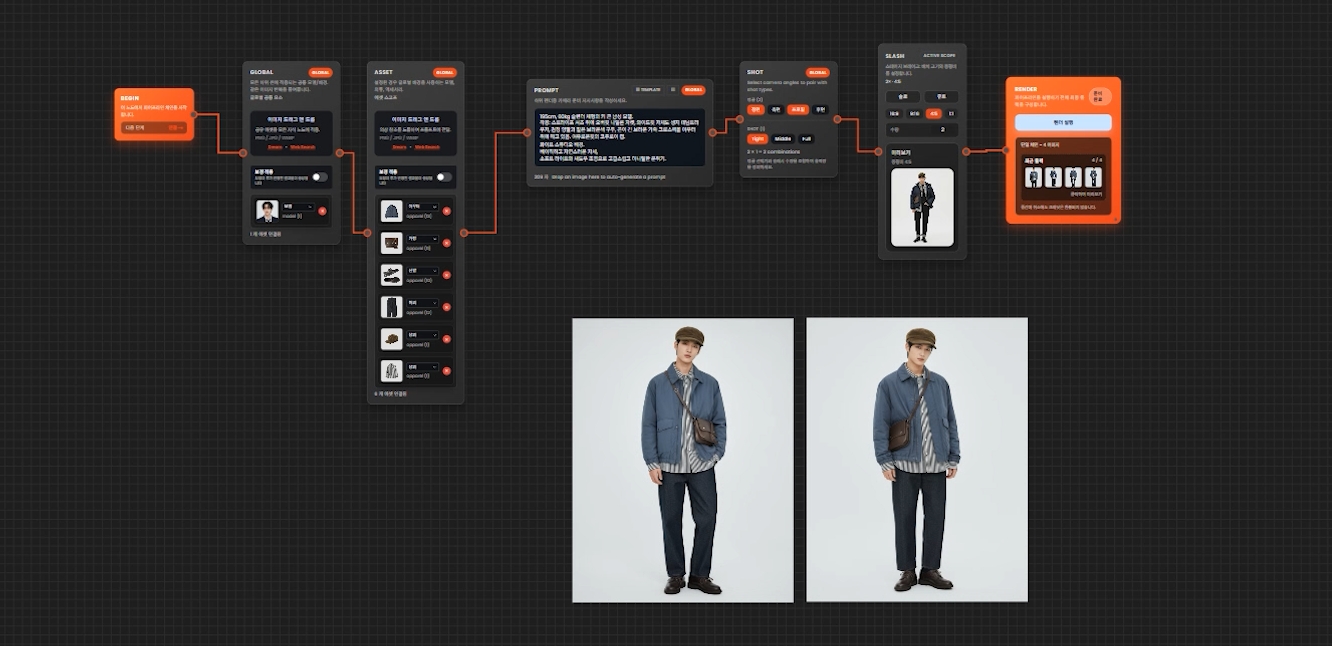
You can confirm that the workflow used in the personal workspace is loaded as is into the team workspace.
How to Collaborate in the Organizational Workspace
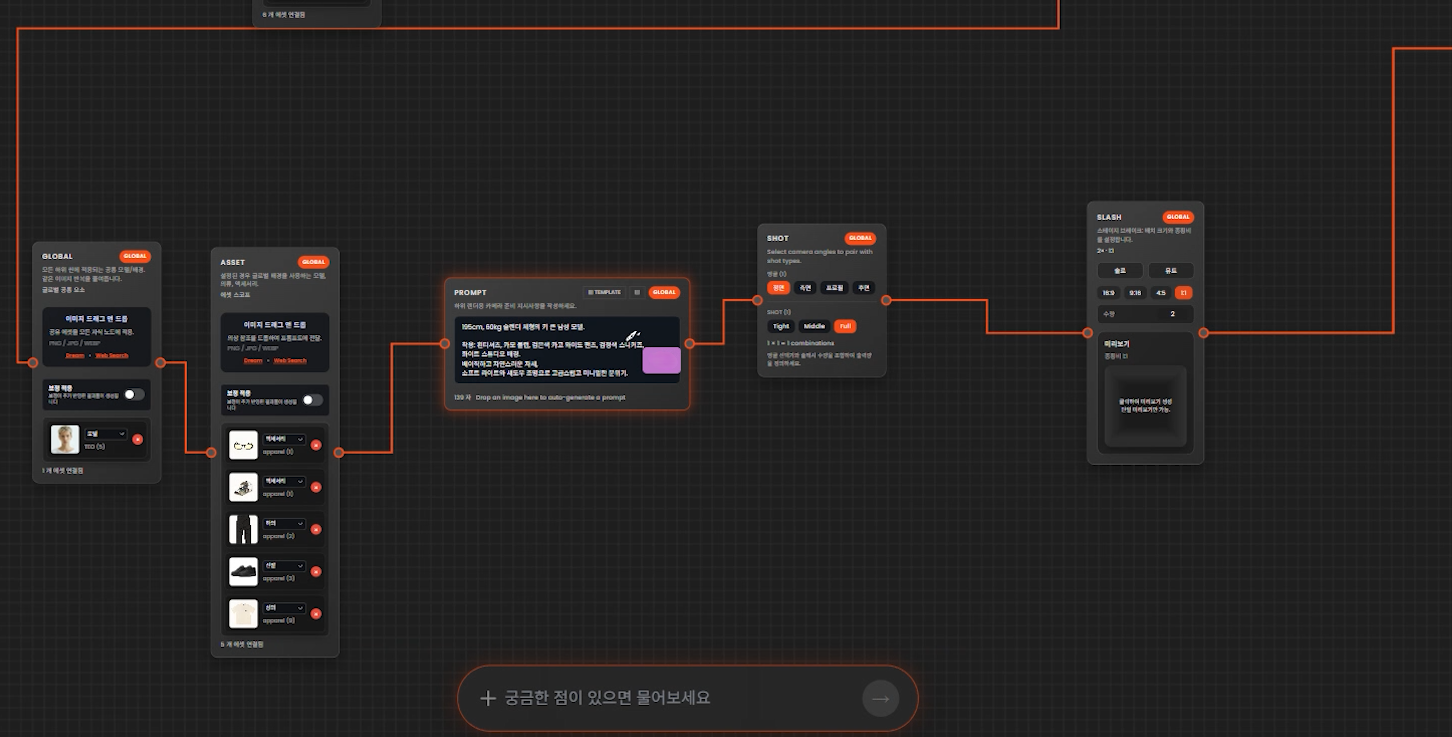
In the organizational workspace, you can check the work status of team members in real-time.
Assets, prompts, shots, and the number of rendered images needed for image creation can be checked together by team members.
Through this process, you can increase the productivity and efficiency of team work and help reduce costs by undergoing multiple reviews.
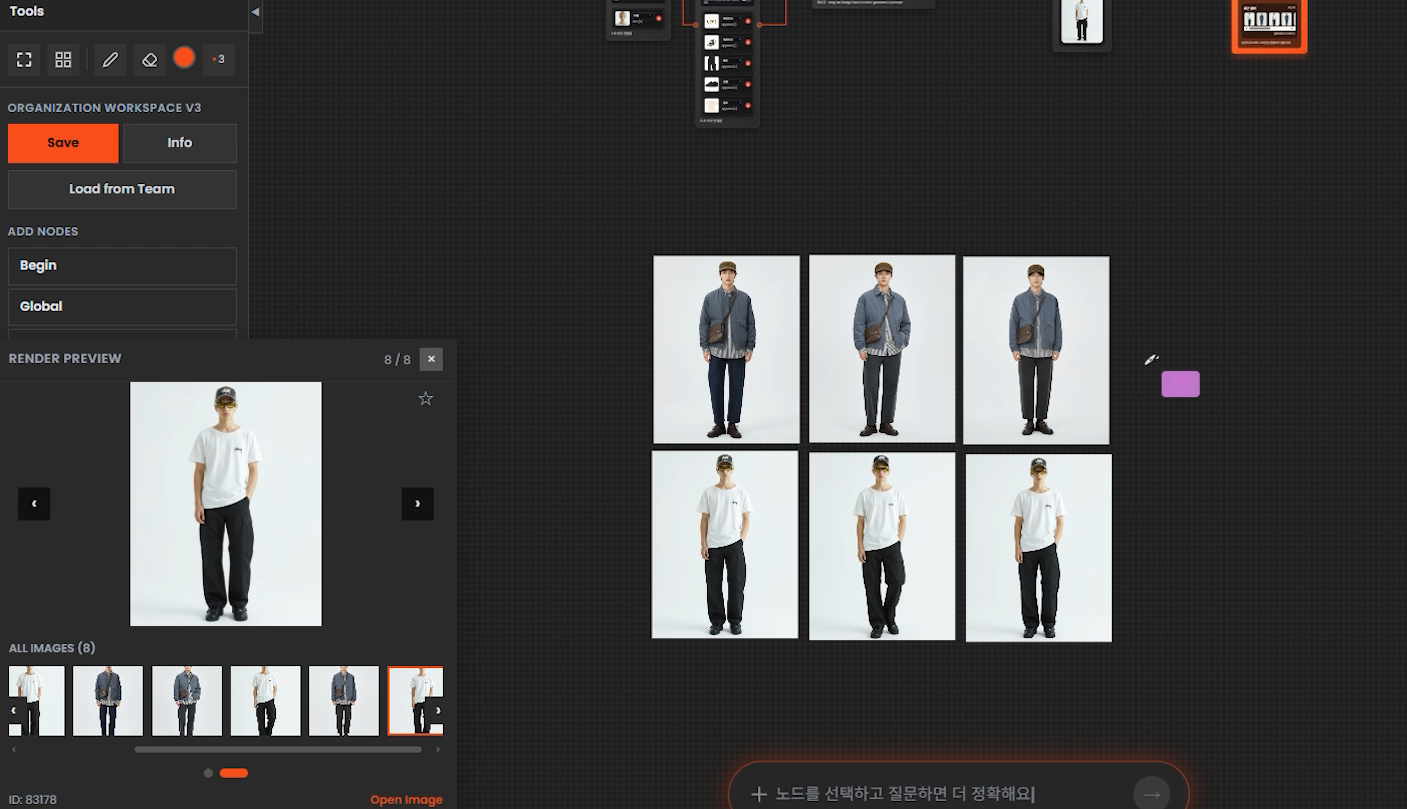
You can communicate with team members by dragging and dropping the images produced through collaboration onto the board.
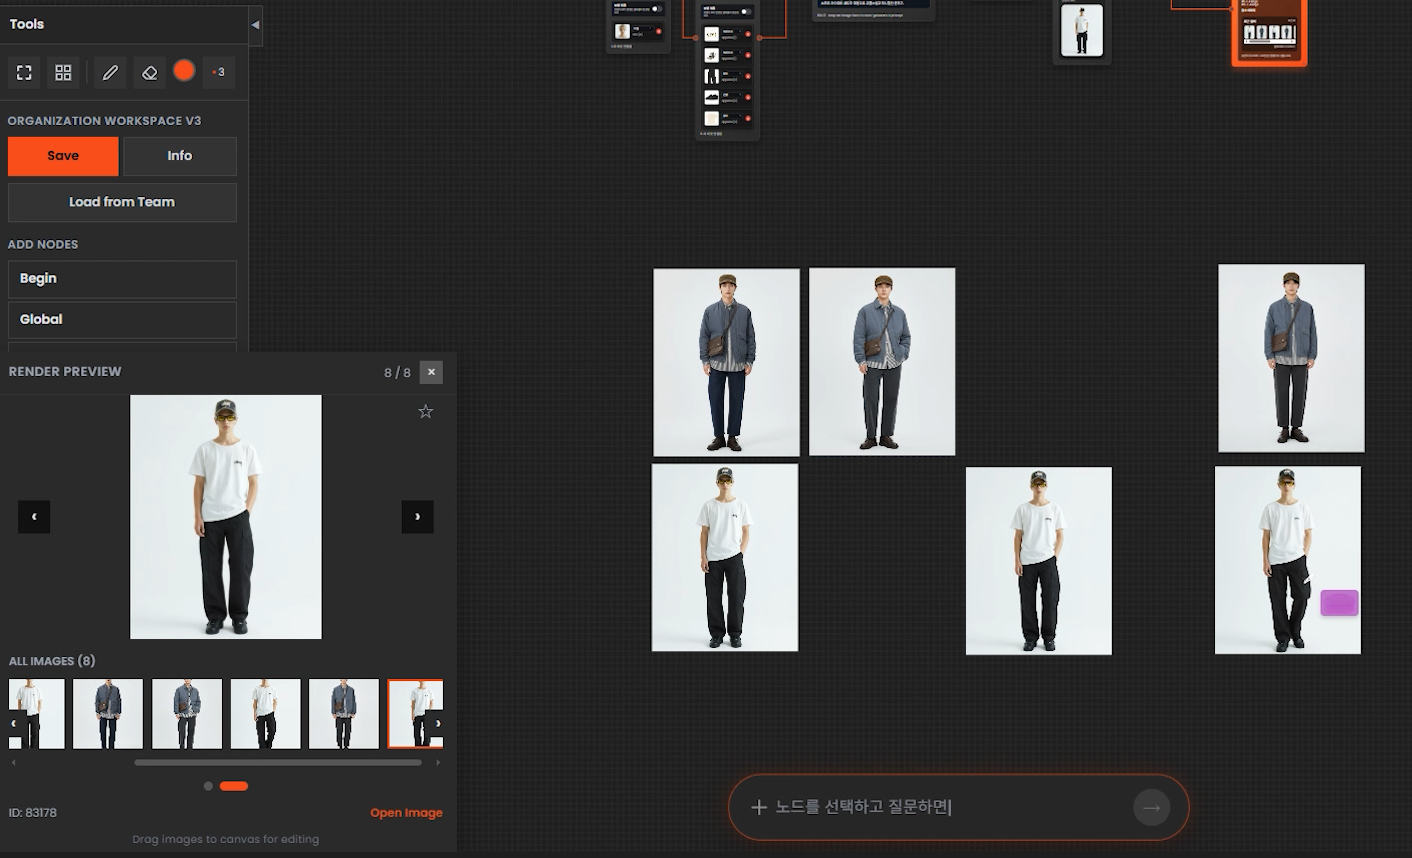
You can select shots you like and exchange opinions. Various methods can be used for this.
You can see in real-time when a team member selects and moves an image.
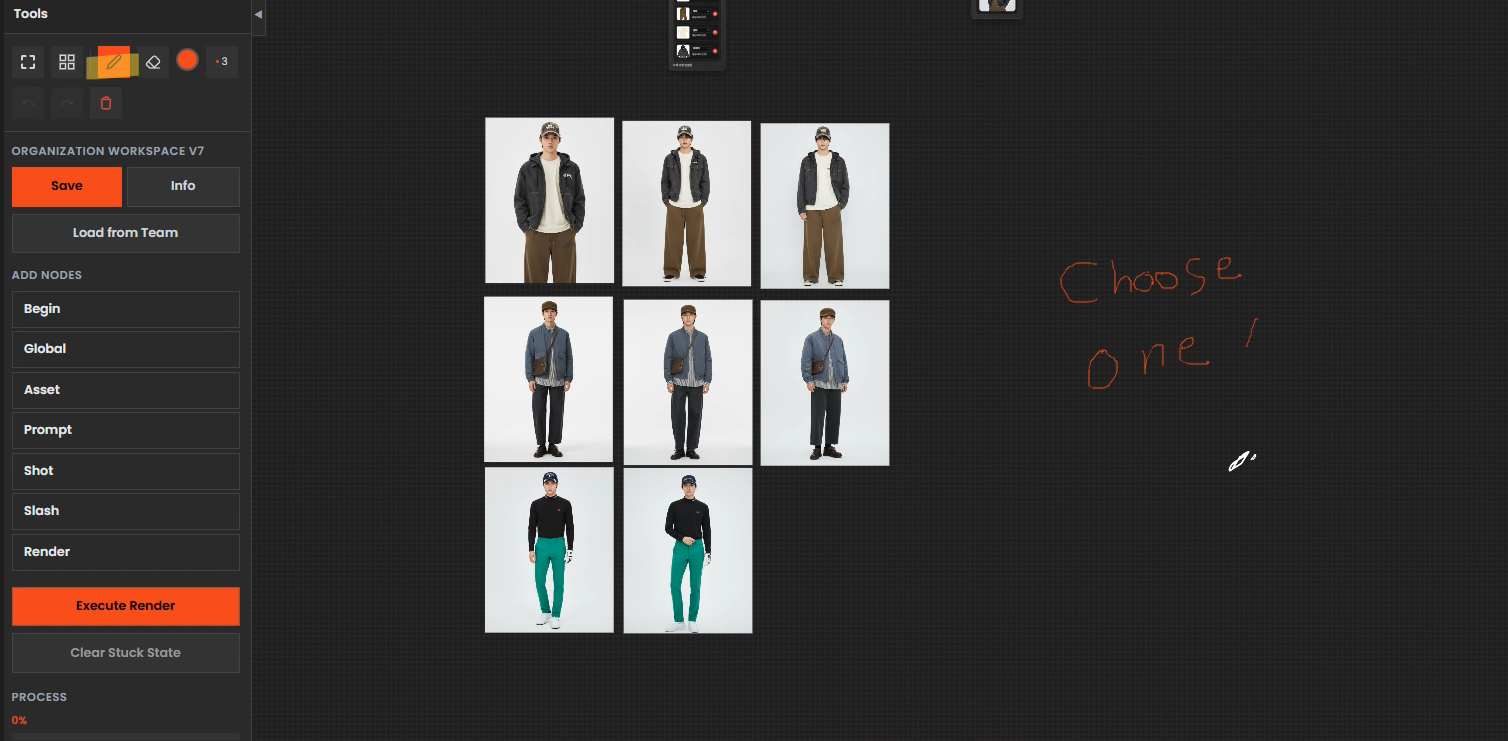
Additionally, you can leave simple notes on the board using the pen tool button on the left toolbar.
These notes can also be checked in real-time by team members.
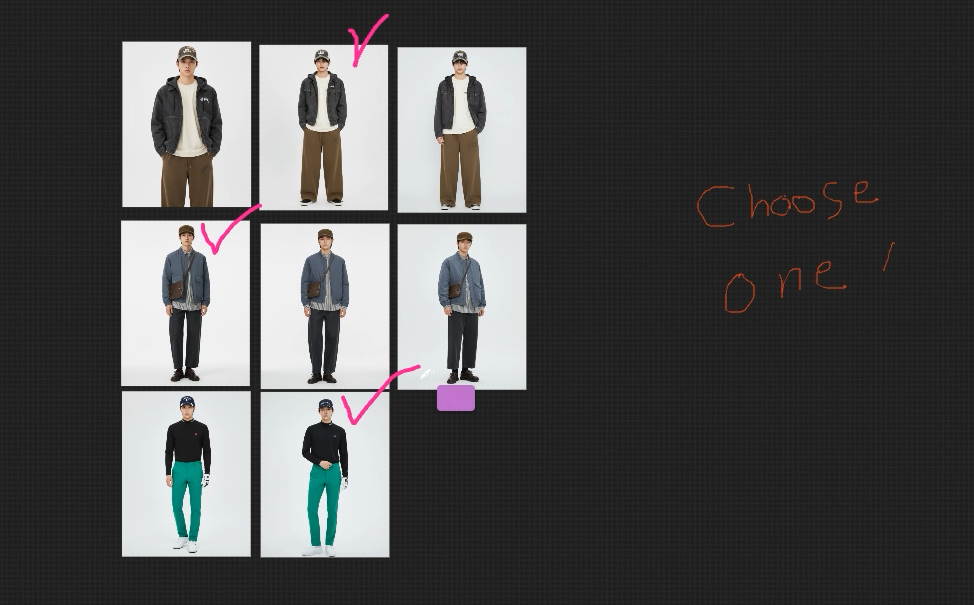
Each team member can choose a unique color to express their opinions and communicate easily.

Press Ctrl + drag on the selected images and press the C key to activate the comment box.
This feature will also be effective for communication and organizing results with team members.
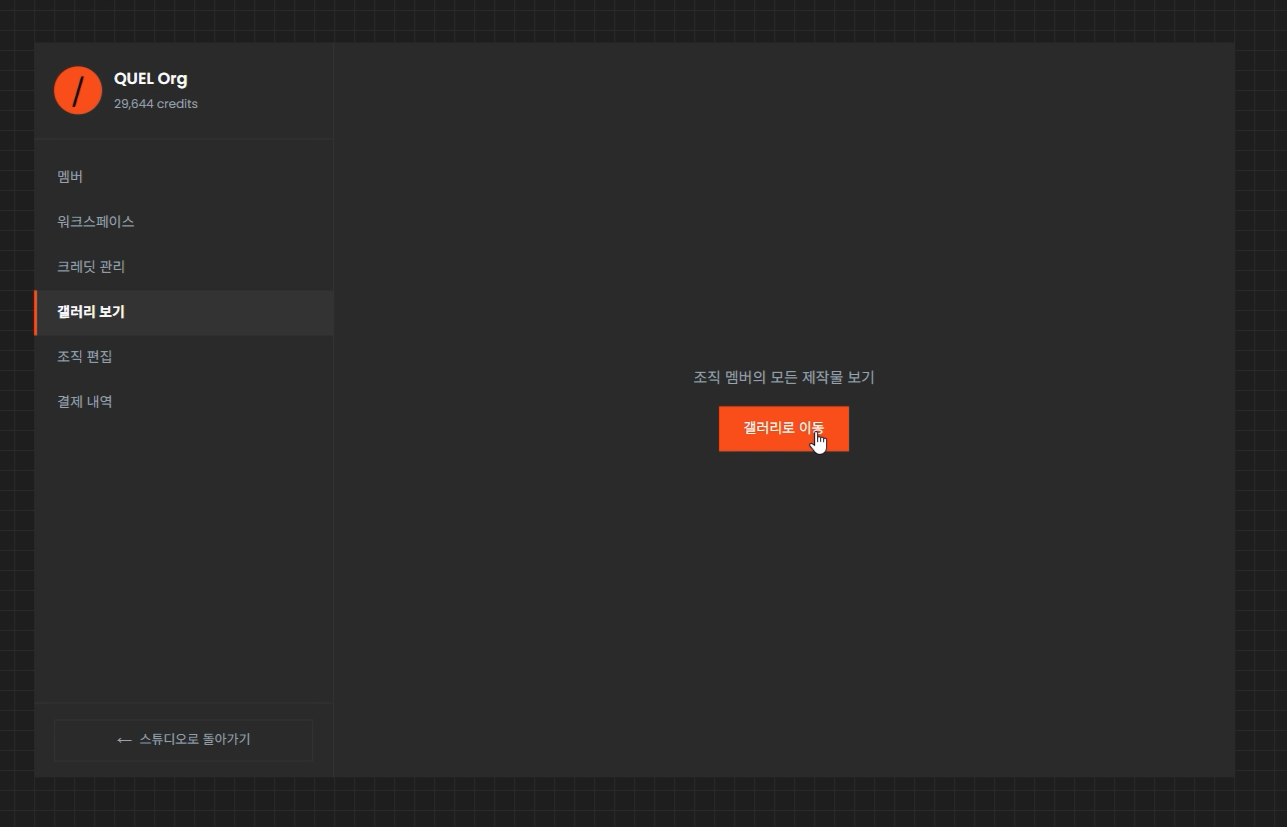
Select gallery view in the organization settings tab to check all the work of team members.


Through gallery archiving, you can check the work of team members and track the workflows used.